Upload your verification documents
To verify your identity, bitwallet requires you to submit your identification documents and current address verification documents. After the approval of each certificate is completed, the available services on bitwallet will be expanded.
This section explains the procedure for uploading verification documents.
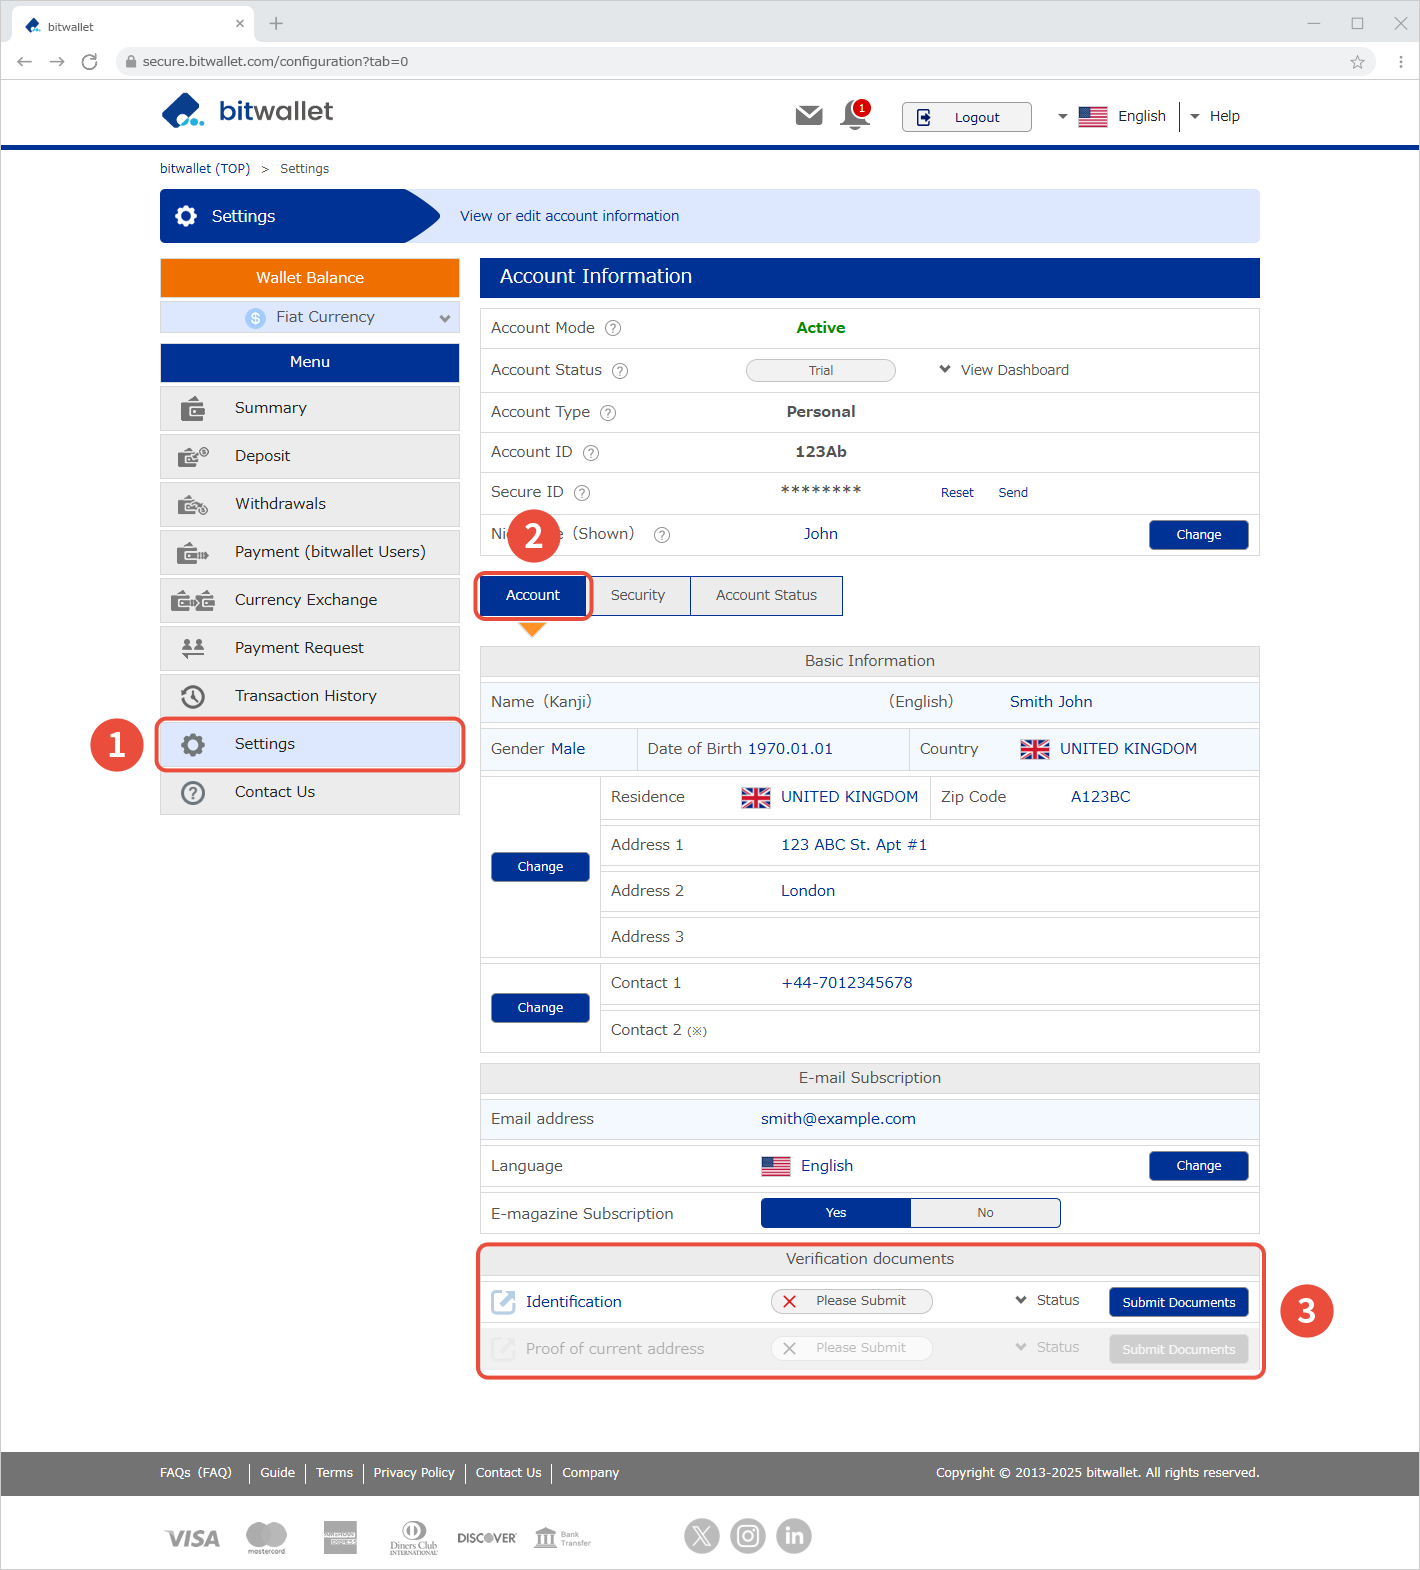
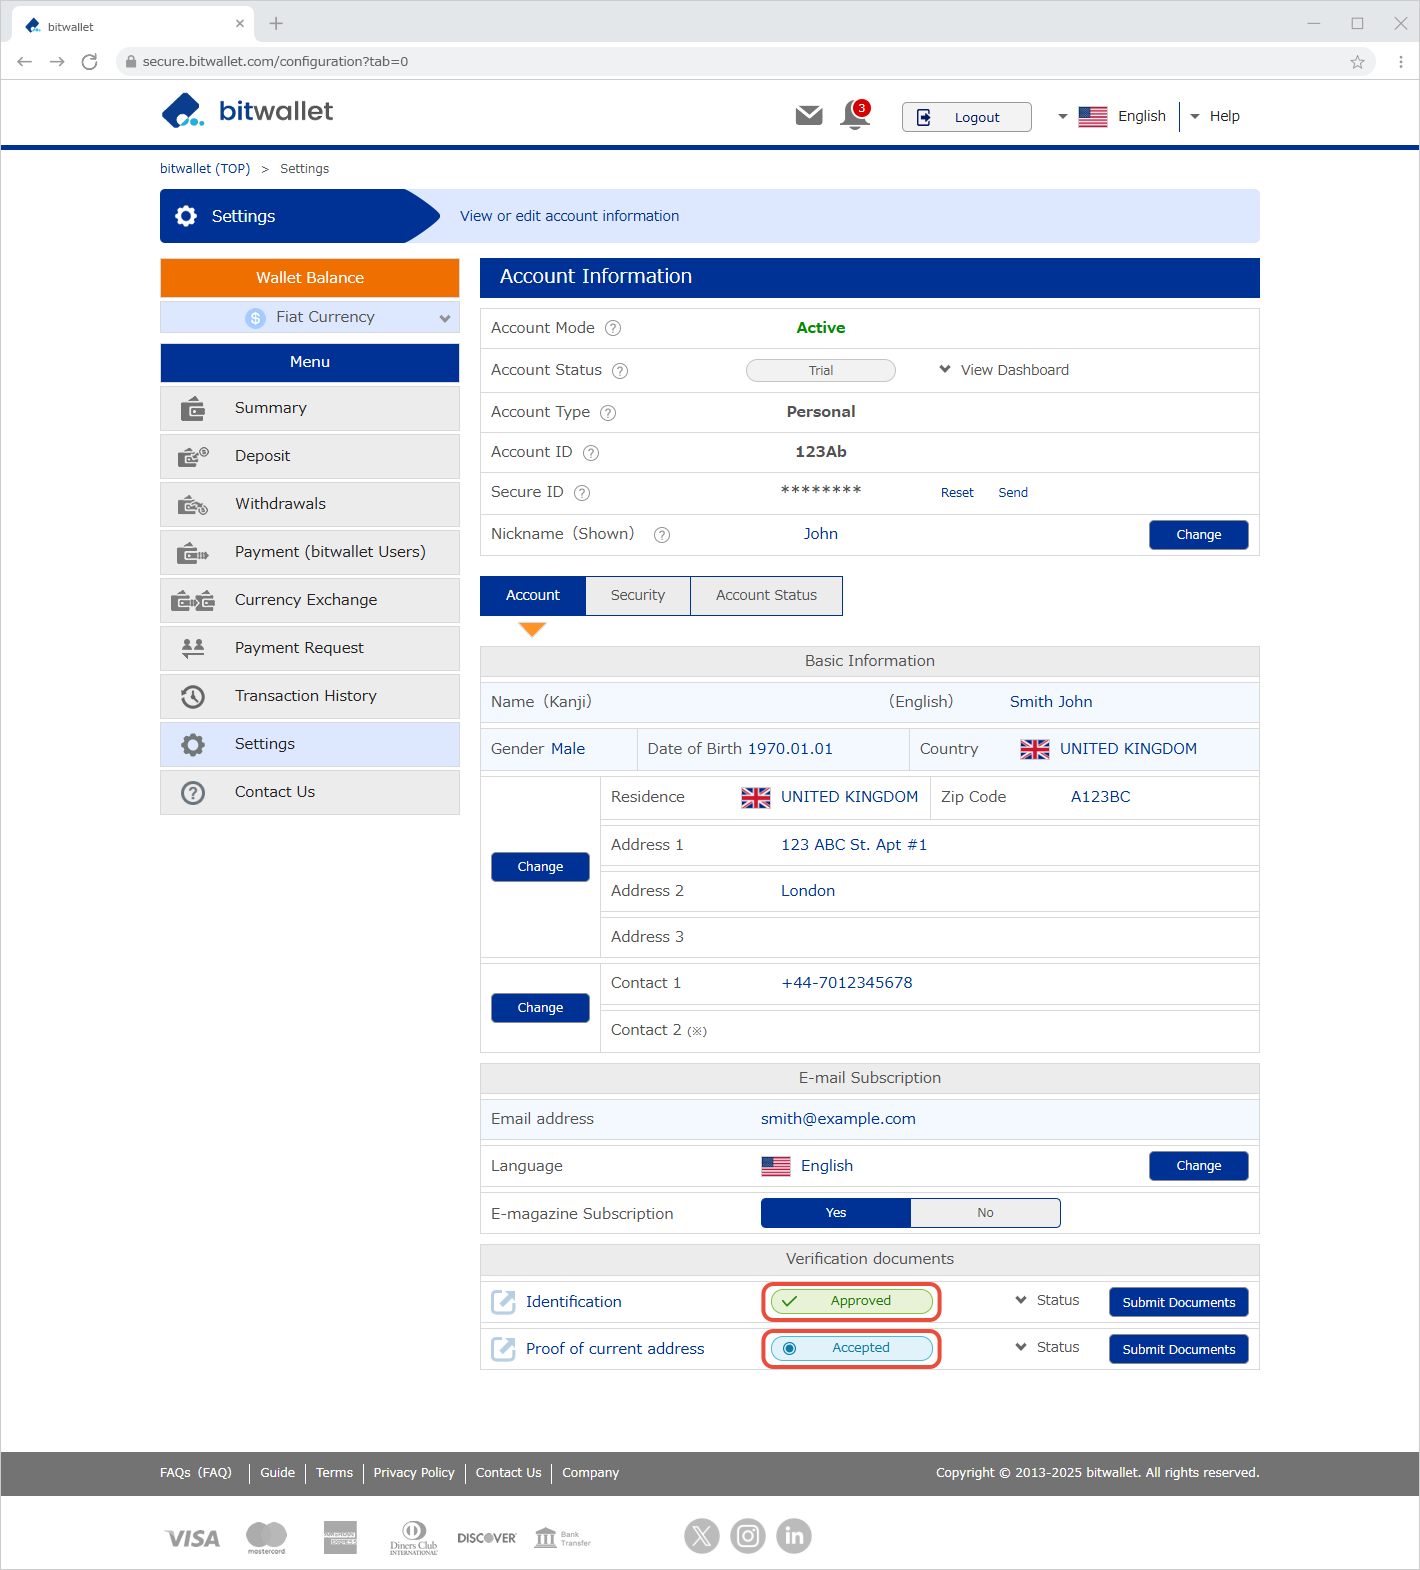
1. Select “Settings” (①) from the menu, then go to under “Verification documents” (③) under “Account” (②), submit the documents for “Identification” and “Proof of current address”.
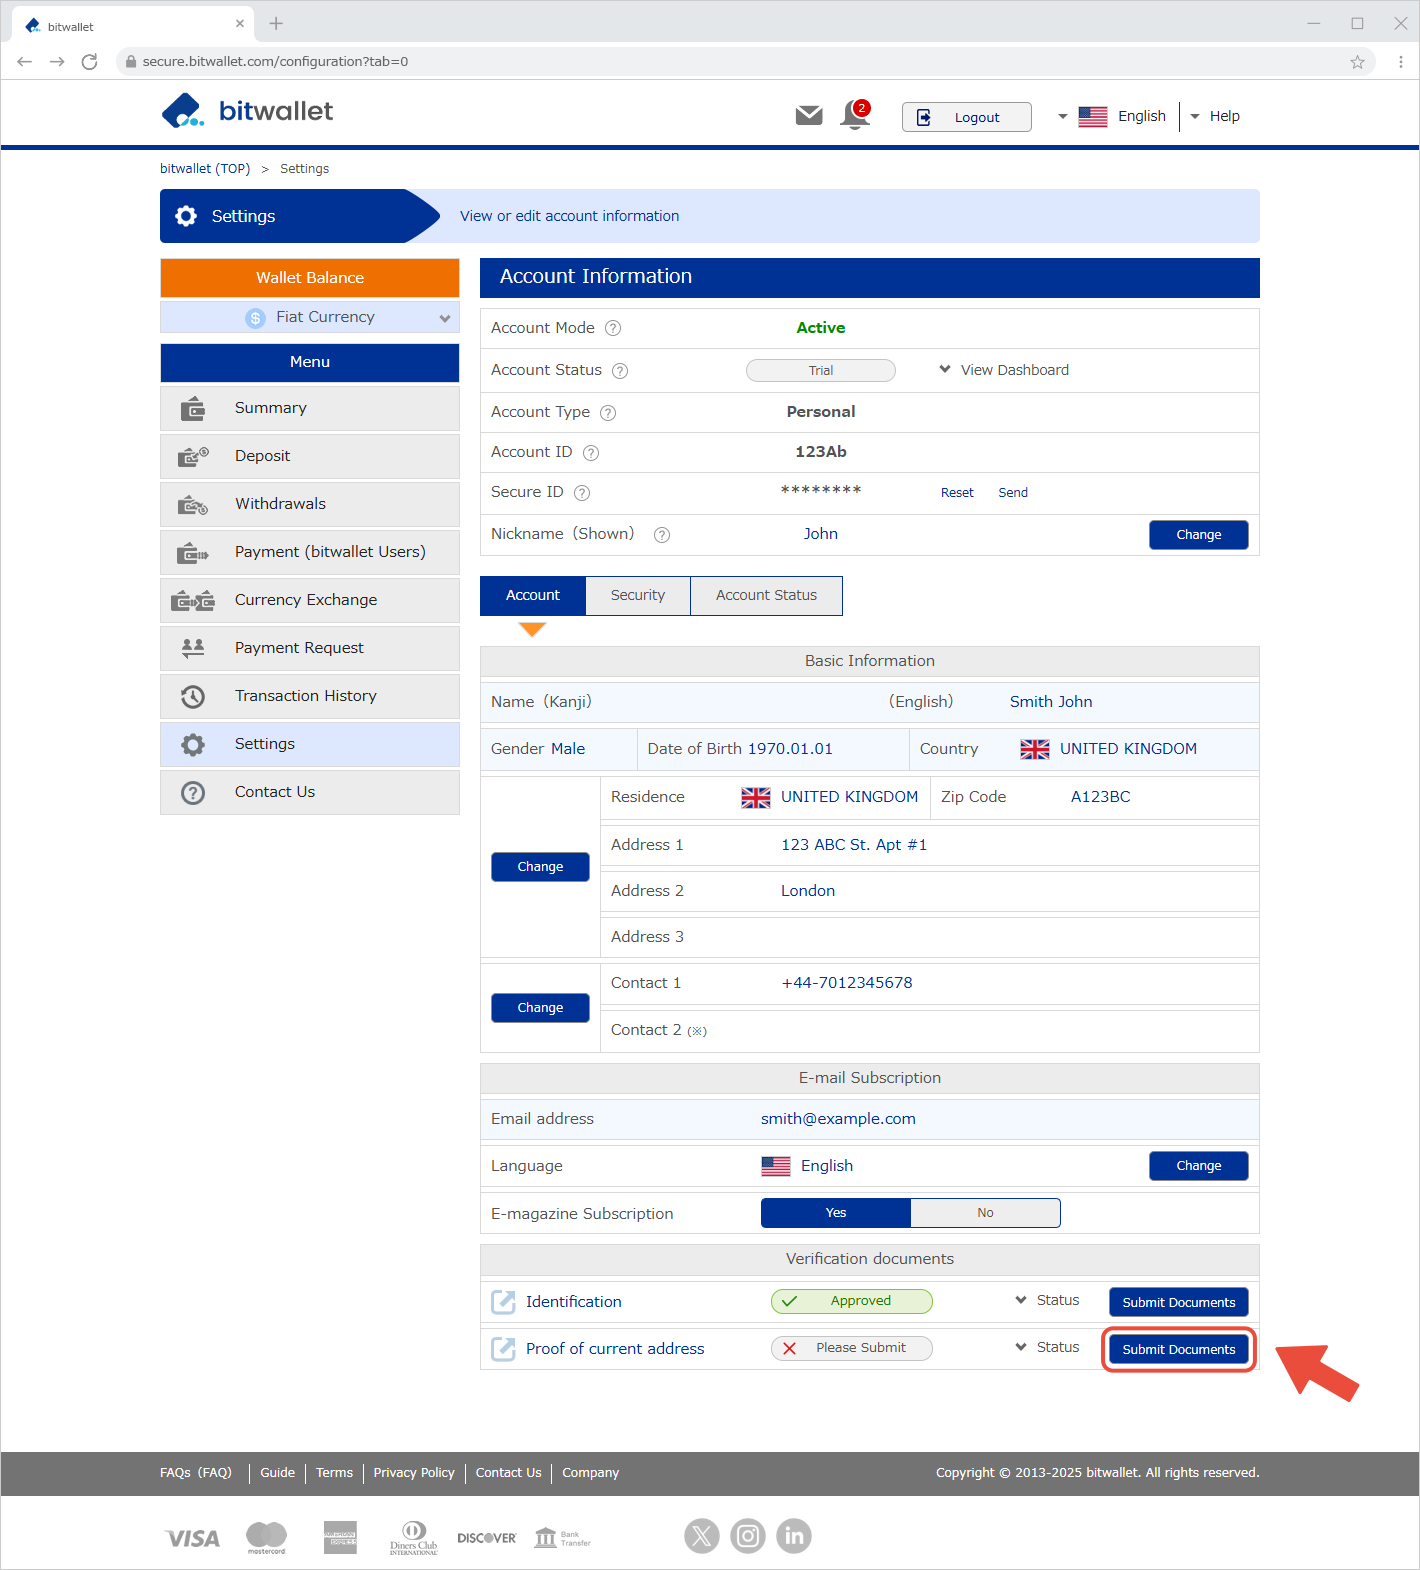
After the approval of the identification documents is completed, you will be able to submit the proof of current address.
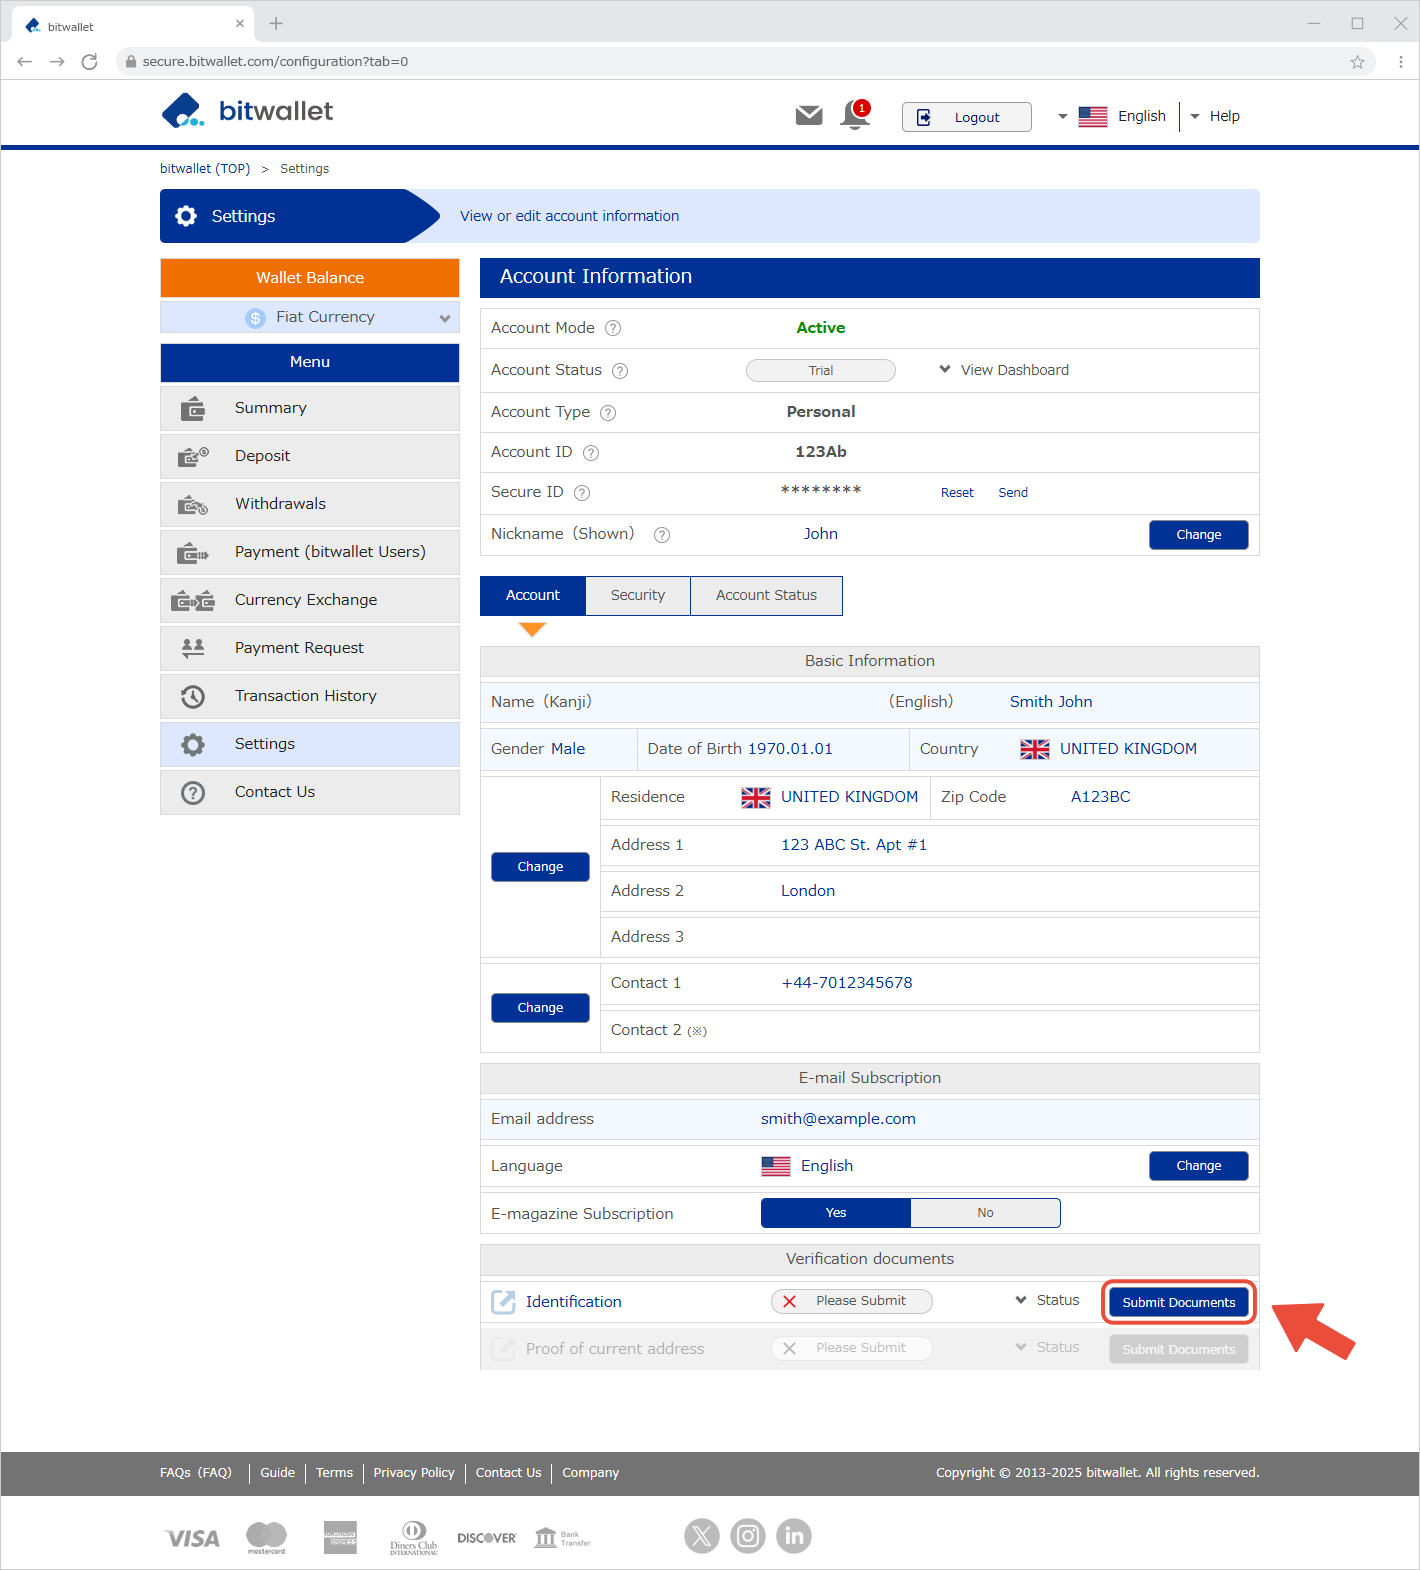
2. Go to Identity Verification → click Submit Document, then upload one photo ID and a selfie (face check) as instructed.
Foreign nationals and Japanese nationals residing outside Japan are required to submit a valid passport.
3. Once your identity verification has been approved, go to “Verification Documents” → “Proof of Address”, click “Submit Document”, and upload your proof of address.
[Proof of Address]
Examples include utility bills, receipts, or documents issued by government agencies.
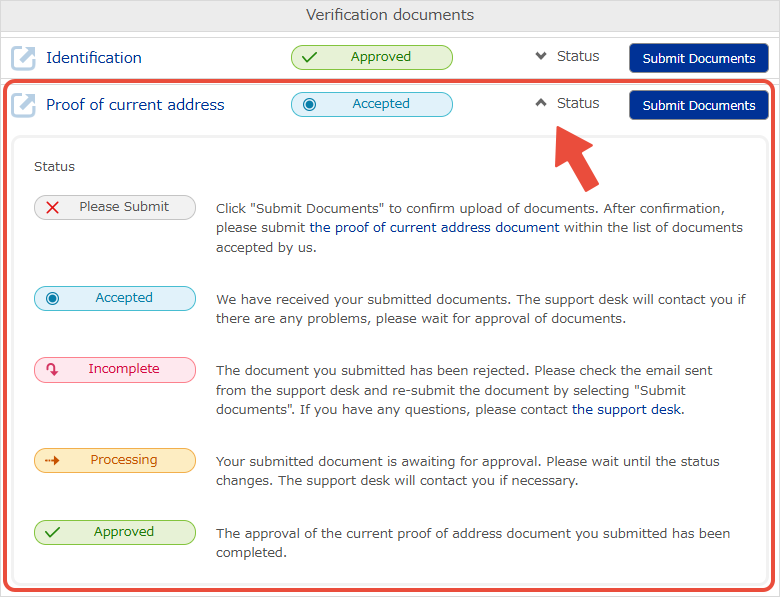
4. “Accepted” will be displayed when the certificate upload is completed.
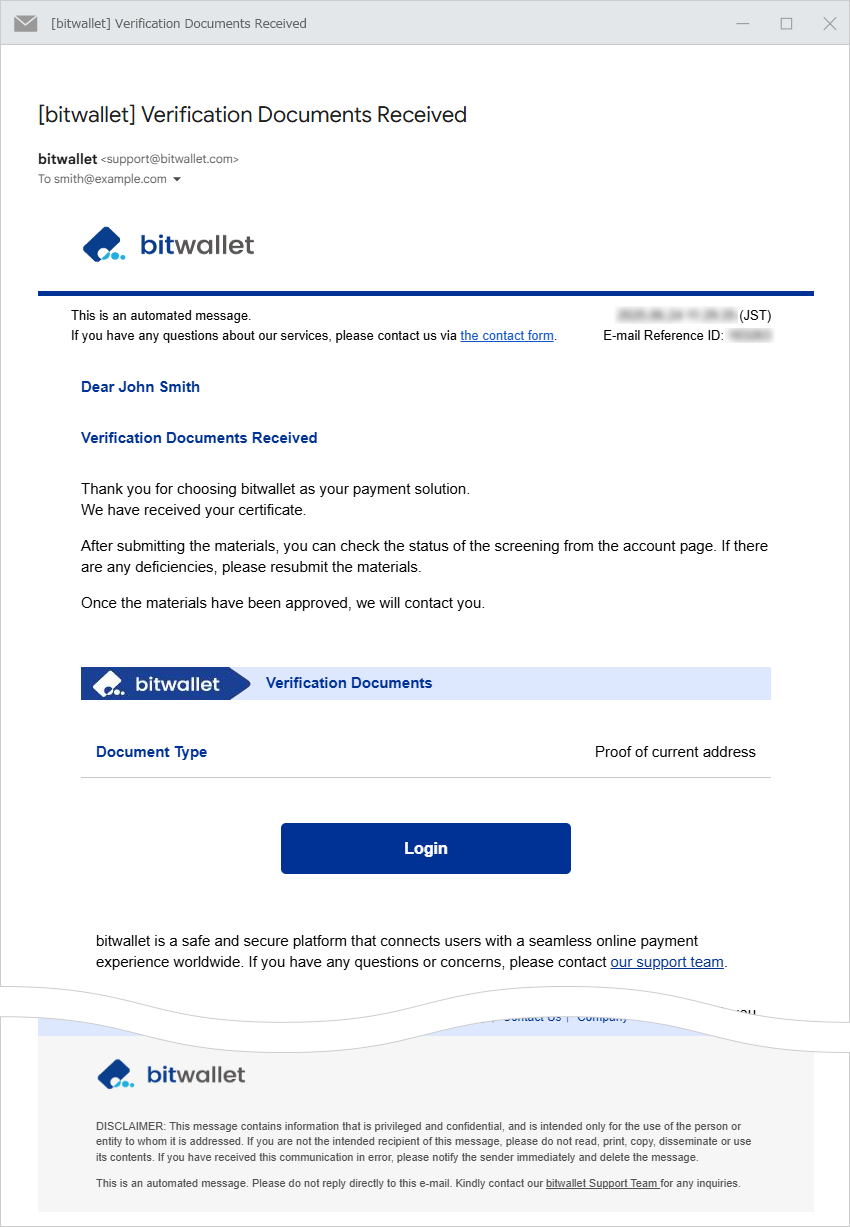
5. After submitting your documents, an email titled “Verification Documents Received” will be sent to your registered email address. The email will include the type of documents you submitted.
Click on “Status” under “Verification documents” to see your current status.